
Brush calligraphy is a modern script that is similar to calligraphy with one main difference–the pen. Traditional calligraphy uses a dip pen or oblique pen and nibs and ink. Brush calligraphy uses a pen that more closely resembles a marker–albeit a special marker that allows for differences in pressure so that one can achieve thin and thick strokes. Letters are formed in similar ways in both brush calligraphy and calligraphy, with many strokes making up each letter. I find brush calligraphy to be a bit more “learner friendly” because the tool to create it is a marker, and that is more commonplace than a nib and a bottle of ink. However, once you learn either calligraphy or brush calligraphy, I find it easy to switch between the two methods.
If you’re wanting to learn how to write in brush calligraphy, you might consider taking a class. I have taught several classes on brush calligraphy in the NW Oklahoma area, and here is a look at what happens at a brush calligraphy class. Upon arriving, you’ll notice the supplies for the workshop. While these can vary depending on the class, you’ll likely see two different sized brush calligraphy pens and a workbook. I have created my own workbook using my own lettering style to teach the class.
First, we learn the basics of brush calligraphy. I show how to hold the pen and go over simple strokes to make with the pen. Then, we slowly and thoroughly learn to write each letter of the alphabet. I provide breaks in-between letters because you might feel hand-fatigue if you’re not used to writing for several minutes at a time. We then advance to lettering words.
Here are some words from past participants on the Brush Calligraphy Classes.
Here are some pictures from a Brush Calligraphy Class in September of 2017. Photography by SAE Photography in Woodward, OK.


Visit the Workshop Page to see if any workshops are on the schedule.
I announce classes I’m going to teach on my Facebook page, Instagram, and through email. You can subscribe for the infrequent, only important information emails here and be the first to know about upcoming workshop dates.
Enjoy!
-Jill
As a kid, my summers were full of workshops-cooking workshops, sewing workshops, arts and craft workshops, workshops on bicycle safety, outdoor camping, babysitting and more. So, when summer rolled around I knew I wanted to offer my Beginner Brush Calligraphy Workshop to kids! The day was divided into two classes, one class for middle school aged students and one class for high school aged students. These workshops were so fun! We began with learning to write the alphabet in brush calligraphy and then finished the class with a watercolor sign, where students penned a motivational quote lettered in brush calligraphy. Look out world, these kids have talent! (And #fail moment, I didn’t get a picture of all the finished signs!) Enjoy a few pictures from the youth class below.


July also saw a private party with a group of friends getting together to celebrate a special birthday! The Brush Calligraphy Class began with the basics of how to hold the brush calligraphy pen and a brief overview of brush calligraphy. We then jumped into drills and learning the lowercase alphabet before learning how to string letters together to form words. We finished this class with a chalkboard, where attendees wrote a quote in brush calligraphy. (I’m learning I need to take more pictures! I only took one at this private party!)

As the carefree days of summer draw to a close with the first day of school approaching, I wanted to give out this freebie! It is a back-to-school themed, printable brush calligraphy worksheet! Feel free to download the Back to School Brush Lettering worksheet and print it. If you need more or new Tombow Dual Brush Pens, you can order them from my website here. My website offers free delivery in Woodward, OK or I can always ship them to you, as well! Use code: 4FOR12 to get four pens for $12.

More workshops are planned for the fall. Currently, ONE seat remains open for the September 14, 2017 Beginner Brush Calligraphy Workshop in Woodward, OK. You can register here.
If you have questions about classes or anything hand-lettered, send me an e-mail at jill@theletterboxshop.com
Enjoy!
-Jill
Last Saturday, I hosted a Snail Mail Retreat at Café Paradee in Woodward, Oklahoma. What a fun and creative time! Participants received a set of notecards, envelopes, postage, and a handout with ways to embellish envelopes. After presenting ideas and examples on how to add flair to the envelopes, participants began writing notes and embellishing envelopes to their friends and family using watercolor paints, markers, gel pens, and vintage stamps. I know so many people will be quite excited to receive these beautiful, fun, and out-of-the-ordinary envelopes! We were also treated to brunch hour’ de voures from Rita at Café Paradee. Enjoy some pictures from the event!


Be on the lookout for the next Snail Mail Retreat coming soon! If you would like to sign up to receive news from The Letter Box, subscribe here.
Thank you ladies for coming to the first Snail Mail Retreat!
-Jill
April is National Letter Writing Month. What better way to prepare to send many cards and letters than setting up a letter writing kit. Snail mail exudes happiness in all stages, from selecting the card to writing the letter, even to addressing the envelope and receiving the card.
If you want to send more snail mail, you will need to do some planning. Planning is the foundation for achieving (or not achieving) the results you desire. I suggest, first, you put together a letter writing kit. This could be in a zippered pouch, a spot on your desk, or in the glove compartment of your car (for all you busy parents driving your kids to and from activities).
After you’ve decided where you will place your letter writing kit, set aside a time every week you will send a piece of snail mail. Go ahead and set a reminder in your phone. I like to send snail mail on Wednesday (Writing Wednesday). If you have the most time to yourself in the mornings, schedule letter writing for the morning. Or maybe lunch time would work better. Or maybe 6:30 on Tuesdays as you wait for your child to get out of basketball practice. Whatever the time, schedule that in your phone so you’ll have a reminder.
Now, assemble your letter writing kit. Here are some suggestions on items to place inside your kit.
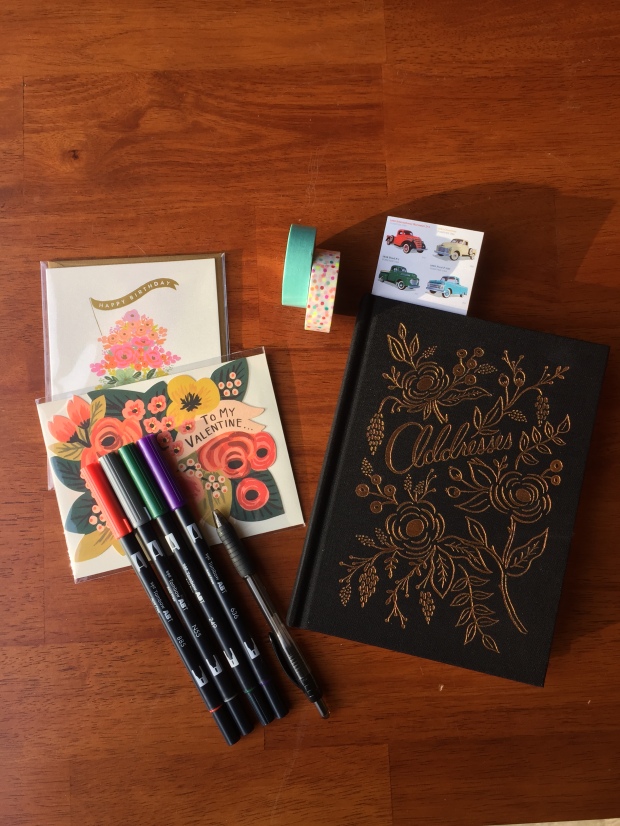
Take time to assemble your letter writing kit and then you’ll be set to send more snail mail! If you’re needing supplies, check out our online store The Letter Box.
Here’s to sending more snail mail!
-Jill